Now that your game is in Tabletop Simulator and you have some experience in the program, let’s optimize the player experience.
You’re probably aware that playing in Tabletop Simulator is very different from playing in the real world. Our goal here in TTS is not to make a version with all the bells and whistles, but to get it playtested / played in the limited time you’ll usually have. Optimizing the Tabletop Simulator means players will struggle less with understanding the tech, which should allow the game to flow more smoothly and let players focus on the game, not the tech.
Match up the player zones and hand zones

By default, when you start a new table / file, you’ll discover a number of hand zones around the edge of the table. These are the colored dots you see when you’re taking a ‘seat’, and where your hand cards are displayed. These are editable, and are an easy way to clarify where a player is expected to sit.
Let’s say your game has a maximum of four players, and they’re of the colors red, yellow, green, and blue. To do this, we’re going to need to change some of these zones’ colors and delete some of them.

Hit F3 or choose the Hand Zones option from the Zones menu (third from the top) to make the zones visible:

The exact number of default hand zones is based on the table – the octagonal table has 8, for example.

Left-click on a zone to bring up the color wheel, then left click on the color you want that zone to be.

I don’t want these diagonal hand zones any more – in other words, I don’t want a player to sit here or use that color. Right click on the hand zone and click delete, and poof – it’s gone.
Lather, rinse, repeat, and voilà!

There we go – next up is to add the player boards, pieces, meeples, or other color-specific pieces as you like near those player area. When someone sits at the red player seat, they should have all their red pieces in front of them and ready to go.
Note we can move them with the Gizmo tool, but I personally just draw a new hand zone whereever I want it to go. To each their own!
Wait, what’s the difference between hidden zones and hand zones, again?

Essentially, the hand zones (like the ones I just deleted) are required. They’re where players will click on to ‘sit down’ at the table.
Hidden zones are optional. They won’t spawn a colorful circle when the game first opens. Hidden zones are always visible to all players (meaning you always know where they are), but only a specific player matching that color can see inside them. You can color these in the same way you just colored the hand zones.
They both only allow one player to see what’s inside, so they’re for private information, GM’s / DM’s needing to refer to things without other players seeing, etc.
Boxes and circles and the text tool
In the real world, you’ll probably designate an area for something as mundane as a discard pile. Because of how spread out things can be, a bit of guidance definitely helps here.

Give you one guess what you’re supposed to do here. Use F2 or the pen tool to make a box, then F7 or the text tool to add text. Bonus points: place a snap point to guarantee all the cards make a nice tidy pile.
Add snap points to keep things tidy
Snap points are at the green dot at the bottom of the left-hand-side menu, or F10 on your keyboard:

Click on the Magnet (‘Snap’) to use that tool, then left click where you want the snap point to go:

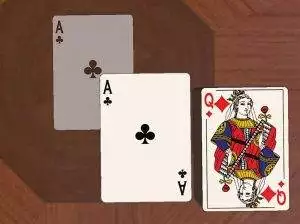
I’ve placed a snap point in the middle of the table, so I bring a card close to it…

I can see where the card will snap to.
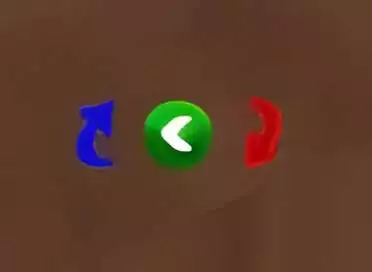
Next, let’s talk about those rotating snap points:

Yes, this looks a little wonky – I took a screenshot and realized it’s so frikkin’ small that I used an upscaling tool to make it bigger. Upscaling a tiny icon (less than 100 pixels on the long side), unsurprisingly, produces artefacts. Ahh, the joys of being a content creator…
Anyway…
The white arrow inside the green snap point tells you which way is ‘up’ in the snap point, while the blue and red arrows let you rotate the snap point clockwise or counter-clockwise, respectively. Each click lets you rotate 15 degrees, regardless of your degrees setting (remember the weightlifter in the upper-right column?).
In this case, I’ve set it to have the ‘top’ pointing west – when I move the card towards the snap point, I see exactly where and how it will snap to:

Success!
Adding a color tint to things
Most things built into TTS have the ability to tint the color of the object. That’s the good news. The bad news: this is a tint added to the base color, meaning you won’t be able to easily color match thing A next to thing B. Still, you can tint a bag to be blue so it matches with the blue resources you’re about to fill the bag with.

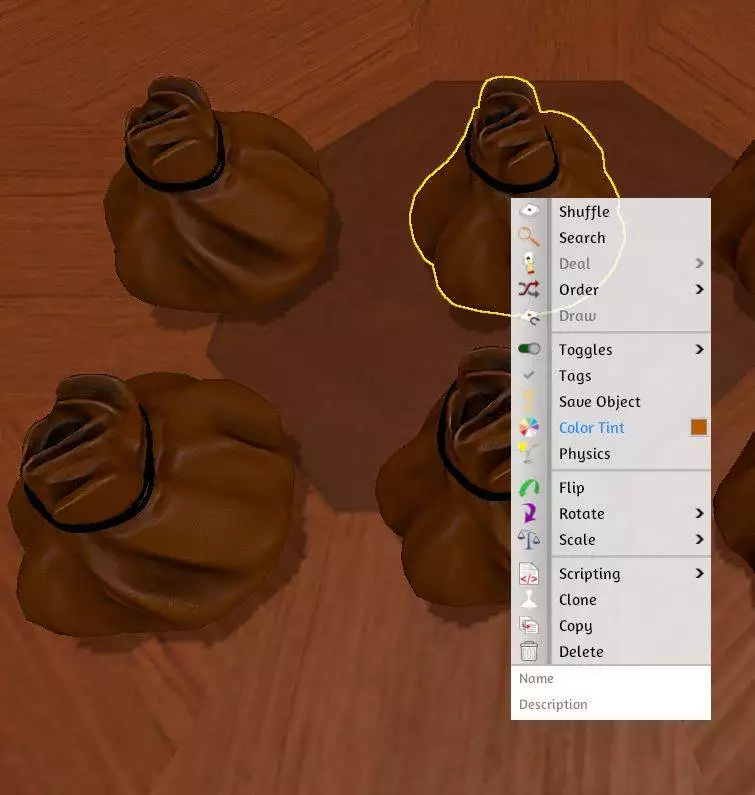
Right-click on the object and click ‘Color Tint’

From here you’ll get a pretty standard color picker – feel free to drag-and-drop over the color you want, or type/paste in the hex code, the HSB value, or the RGB value. Remember to hit ‘Apply’.

Presenting the extremes – from top left to bottom right, we have the original color, red, green, blue, white, and black. The white ends up looking like more of a light-to-medium gray because of that tint.
Add pop-up / hover-over descriptions
Sometimes an obvious bit of text on the table is exactly what you need. Sometimes you want something that doesn’t take up room on the table. To add some pop-up / hover-over descriptions, right click on the thing and look to the very bottom of the context menu:

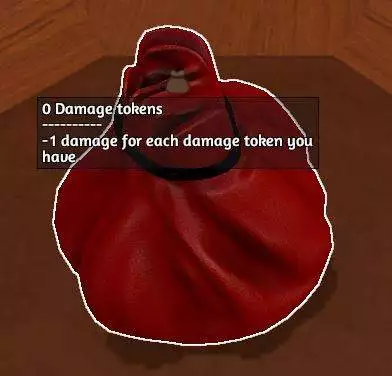
There are two fields here: a ‘Name’ and a ‘Description’. The Name pops up as soon as your mouse hovers over the thing. If it lingers for a second or so, the Description then joins the fun:

Because this is a bag that can hold countable objects, you’ll see the number of objects next to the title (in this case, 0). Ideally the title is what’s in the bag, with the description giving a bit more context. Note that line of hyphens / dashes is built-in and cannot be removed.
Lock it down!


With your mouse cursor over an object, hit ‘L’ on your keyboard to lock it down. When it’s not locked down (meaning it can be moved around), notice how your mouse cursor is a five-fingered hand. There’s also a white border / glow showing that’s it’s highlighted.
When it’s locked down, it can’t be moved and there’s no white glow. You’ll also notice your hand just has two fingers: a thumb and a pointing finger.
Alright, that’s going to wrap up this post – for previous posts in the series, check out the following:


